Select Server
Average delivery time 5-30 Mins
  • All Damage Multiplier
  • Armor
  • Attack Speed
  • Barrier Generation
  • Cold Damage Multiplier
  • Cold Resistance
  • Cooldown Reduction
  • Critical Strike Chance
  • Critical Strike Damage Multiplier
  • Damage
  • Damage Over Time Multiplier
  • Damage Reduction
  • Dexterity
  • Dodge Chance
  • Energy On Kill
  • Energy Regeneration
  • Essence On Kill
  • Essence Regeneration
  • Faith On Kill
  • Faith Regeneration
  • Fire Damage Multiplier
  • Fire Resistance
  • Fortify Generation
  • Fury On Kill
  • Fury Regeneration
  • Healing Received
  • Holy Damage Multiplier
  • Impairment Reduction
  • Intelligence
  • Life On Hit
  • Life on Kill
  • Life Regeneration
  • Lightning Damage Multiplier
  • Lightning Resistance
  • Lucky Hit Chance
  • Mana On Kill
  • Mana Regeneration
  • Maximum Evade Charges
  • Maximum Life
  • Maximum Resource
  • Movement Speed
  • Physical Damage Multiplier
  • Physical Resistance
  • Poison Damage Multiplier
  • Poison Resistance
  • Potion Capacity
  • Resistance to All Elements
  • Resource Cost Reduction
  • Resource Generation
  • Shadow Damage Multiplier
  • Shadow Resistance
  • Spirit On Kill
  • Spirit Regeneration
  • Strength
  • Thorns
  • to Abyss Skills
  • to Advance
  • to Aegis
  • to Agility Skills
  • to All Skills
  • to Ancient Skills
  • to Arc Lash
  • to Armored Hide
  • to Arrow Storm Skills
  • to Aura Skills
  • to Ball Lightning
  • to Barrage
  • to Bash
  • to Basic Skills
  • to Blade Shift
  • to Blazing Scream
  • to Blessed Hammer
  • to Blessed Shield
  • to Blight
  • to Blizzard
  • to Blood Howl
  • to Blood Lance
  • to Blood Mist
  • to Blood Skills
  • to Blood Surge
  • to Bombardment
  • to Bone Prison
  • to Bone Skills
  • to Bone Spear
  • to Bone Spirit
  • to Bone Splinters
  • to Boulder
  • to Brandish
  • to Brawling Skills
  • to Caltrops
  • to Centipede Skills
  • to Chain Lightning
  • to Challenging Shout
  • to Charge
  • to Charged Bolts
  • to Clash
  • to Claw
  • to Cold Imbuement
  • to Combat Skills
  • to Command Fallen
  • to Companion Skills
  • to Concealment
  • to Concussive Stomp
  • to Condemn
  • to Conjuration Skills
  • to Consecration
  • to Core Skills
  • to Corpse Explosion
  • to Corpse Skills
  • to Corpse Tendrils
  • to Counterattack
  • to Crushing Hand
  • to Curse Skills
  • to Cutthroat Skills
  • to Cyclone Armor
  • to Dance of Knives
  • to Dark Prison
  • to Dark Shroud
  • to Darkness Skills
  • to Dash
  • to Death Blow
  • to Debilitating Roar
  • to Decompose
  • to Decrepify
  • to Defensive Skills
  • to Defiance Aura
  • to Demonology Skills
  • to Disciple Skills
  • to Divine Lance
  • to Doom
  • to Double Swing
  • to Dread Claws
  • to Dust Devil Skills
  • to Eagle Skills
  • to Earth Skills
  • to Earth Spike
  • to Earthen Bulwark
  • to Earthquake Skills
  • to Falling Star
  • to Familiar
  • to Fanaticism Aura
  • to Fire Bolt
  • to Fireball
  • to Firewall
  • to Flame Shield
  • to Flay
  • to Flurry
  • to Focus Skills
  • to Forceful Arrow
  • to Frenzy
  • to Frost Bolt
  • to Frost Nova
  • to Frost Skills
  • to Frozen Orb
  • to Golem
  • to Gorilla Skills
  • to Grenade Skills
  • to Ground Stomp
  • to Hammer of the Ancients
  • to Heartseeker
  • to Hell Fracture
  • to Hellfire Skills
  • to Hellion Sting
  • to Hemorrhage
  • to Holy Bolt
  • to Holy Light Aura
  • to Human Skills
  • to Hurricane
  • to Hydra
  • to Ice Armor
  • to Ice Blades
  • to Ice Shards
  • to Imbuement Skills
  • to Incinerate
  • to Infernal Breath
  • to Invigorating Strike
  • to Iron Maiden
  • to Iron Shrapnel Skills
  • to Iron Skin
  • to Jaguar Skills
  • to Juggernaut Skills
  • to Justice Skills
  • to Kick
  • to Landslide
  • to Leap
  • to Lightning Spear
  • to Lightning Storm
  • to Lunging Strike
  • to Macabre Skills
  • to Marksman Skills
  • to Martial Skills
  • to Mastery Skills
  • to Maul
  • to Meteor
  • to Mighty Throw
  • to Minion Skills
  • to Molten Bomb
  • to Nature Magic Skills
  • to Nether Step
  • to Occult Skills
  • to Payback
  • to Penetrating Shot
  • to Poison Creeper
  • to Poison Imbuement
  • to Poison Trap
  • to Potency Skills
  • to Profane Sentinel
  • to Pulverize
  • to Puncture
  • to Purify
  • to Pyromancy Skills
  • to Quill Volley
  • to Rabies
  • to Rake
  • to Rally
  • to Rallying Cry
  • to Rampage
  • to Rapid Fire
  • to Ravager
  • to Ravens
  • to Razor Wings
  • to Reap
  • to Rend
  • to Rock Splitter
  • to Rupture
  • to Rushing Claw
  • to Scourge
  • to Sever
  • to Shade Skills
  • to Shadow Imbuement
  • to Shadow Step
  • to Shapeshifting Skills
  • to Shield Bash
  • to Shield Charge
  • to Shock Skills
  • to Shred
  • to Sigil of Chaos
  • to Sigil of Subversion
  • to Sigil of Summons
  • to Skeleton Mage
  • to Skeleton Warrior
  • to Smoke Grenade
  • to Soar
  • to Spark
  • to Spear of the Heavens
  • to Steel Grasp
  • to Stinger
  • to Stone Burst
  • to Storm Skills
  • to Storm Strike
  • to Subterfuge Skills
  • to Teleport
  • to Thrash
  • to Thunderspike
  • to Tornado
  • to Tortured Wretch
  • to Touch of Death
  • to Toxic Skin
  • to Trample
  • to Trap Skills
  • to Twisting Blades
  • to Tyrant's Grasp
  • to Umbral Chains
  • to Upheaval
  • to Valor Skills
  • to Versatile Skills
  • to Vortex
  • to Wall of Agony
  • to War Cry
  • to Weapon Mastery Skills
  • to Werebear Skills
  • to Werewolf Skills
  • to Whirlwind
  • to Wind Shear
  • to Withering Fist
  • to Wolves
  • to Wrath Skills
  • to Zeal
  • to Zealot Skills
  • Vigor On Kill
  • Vigor Regeneration
  • Vulnerable Damage Multiplier
  • Weapon Damage
  • Willpower
  • Wrath every 10 Kills
  • Wrath Regeneration
Search
Close

Sort By:Best Match

  • Best Match
  • Name A-Z
  • Name Z-A
  • Sales High to Low
  • Sales Low to High
  • Price High to Low
  • Price Low to High
Under This Category, Total Of 206 Products
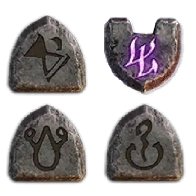
  • BUY Enigma-Diablo 4 Items

    Enigma

    $ 0.94
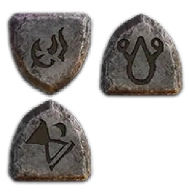
  • BUY Infinity-Diablo 4 Items

    Infinity

    $ 0.26
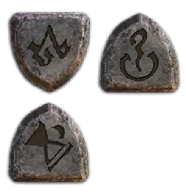
  • BUY Insight-Diablo 4 Items

    Insight

    $ 0.32
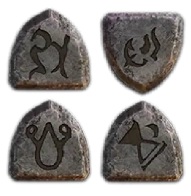
  • BUY Call to Arms-Diablo 4 Items

    Call to Arms

    $ 0.96
  • BUY Grief-Diablo 4 Items

    Grief

    $ 0.43
  • BUY Spirit-Diablo 4 Items

    Spirit

    $ 0.14
  • BUY Stealth-Diablo 4 Items

    Stealth

    $ 0.04
  • BUY Ancient's Pledge-Diablo 4 Items

    Ancient's Pledge

    $ 0.06
  • BUY Edge-Diablo 4 Items

    Edge

    $ 0.26
  • BUY Holy Thunder-Diablo 4 Items

    Holy Thunder

    $ 0.1
  • BUY King's Grace-Diablo 4 Items

    King's Grace

    $ 0.14
  • BUY Leaf-Diablo 4 Items

    Leaf

    $ 0.26
  • BUY Lore-Diablo 4 Items

    Lore

    $ 0.06
  • BUY Pattern-Diablo 4 Items

    Pattern

    $ 0.12
  • BUY Phoenix-Diablo 4 Items

    Phoenix

    $ 1.05
  • BUY Prudence-Diablo 4 Items

    Prudence

    $ 0.29
  • BUY Rain-Diablo 4 Items

    Rain

    $ 0.31
  • BUY Strength-Diablo 4 Items

    Strength

    $ 0.24
  • BUY Zephyr-Diablo 4 Items

    Zephyr

    $ 0.04
  • BUY PocQue - Voracious Fortress-Diablo 4 Items

    PocQue - Voracious Fortress

    $ 0.07
Filter
X
Change the price

Title:

Price:
    Cancel Sure

    Buy Diablo 4 Runewords for Endgame Builds

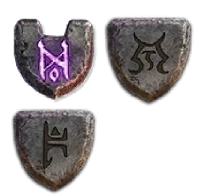
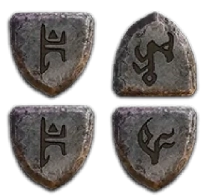
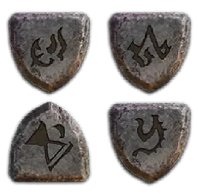
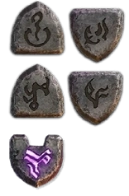
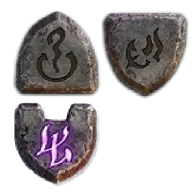
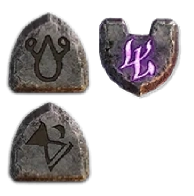
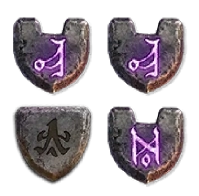
    Diablo 4 Runewords combine a Ritual Rune and an Invocation Rune to create additional effects for your character.

    By choosing the right Rune combination, you can add effects that support your skills, movement, damage, defense, resources, cooldowns, or other build mechanics.


    What Are Diablo 4 Runewords?

    A Runeword is created by combining one Ritual Rune and one Invocation Rune in compatible two-Socket equipment.

    The Ritual Rune generates Offering when its activation condition is fulfilled. The Invocation Rune then consumes the required Offering to activate its effect.

    Because Ritual and Invocation Runes can be paired in different combinations, you can customize the effect to better match your build and playstyle.


    How Do Runewords Work?

    Runewords use Offering as the resource that connects the two Rune types.

    • Ritual Rune: Generates Offering when its listed condition is met.
    • Offering: The resource generated by the Ritual Rune.
    • Invocation Rune: Consumes Offering to activate its effect.
    • Overflow: Some Invocation Runes gain additional benefits when you generate more Offering than the amount required.

    For example, a Ritual Rune may generate Offering when you move, cast a skill, use Evade, or perform another specific action. Once enough Offering is generated, the paired Invocation Rune activates its effect.


    Ritual Runes & Invocation Runes

    There are two Rune types, and both are required to create a Runeword.

    Ritual Runes determine how Offering is generated. Their conditions can be tied to actions such as moving, casting skills, using Evade, or triggering other combat mechanics.

    Invocation Runes determine what happens after enough Offering is collected. Their effects can provide additional skills, defensive effects, movement benefits, resource recovery, damage bonuses, and other character enhancements.

    Choosing a Ritual Rune that fits your normal gameplay can make the Invocation effect easier to activate consistently.


    Diablo 4 Rune Rarities

    Runes come in Magic, Rare, and Legendary rarities. Higher-rarity Runes generally provide stronger effects, making rarity an important factor when comparing available Runes.

    However, rarity alone does not determine whether a Rune is right for your character. The activation condition, Offering requirement, Invocation effect, and compatibility with your build should also be considered.


    Runeword Combinations

    Any Ritual Rune can be paired with any Invocation Rune, giving you different ways to create a Runeword.

    The resulting combination determines how Offering is generated and which Invocation effect becomes available. This makes Rune selection more flexible than simply choosing a predefined gear bonus.

    When comparing combinations, check both sides of the Runeword. A strong Invocation effect may be less useful if its Offering requirement does not fit naturally into your build's normal skill rotation.


    Runewords for Different Builds

    Runewords can support many different playstyles depending on the combination you choose.

    Their effects can help with:

    • Damage and offensive skills
    • Defensive abilities
    • Movement and mobility
    • Resource management
    • Cooldown-related effects
    • Additional class skills
    • Other build-specific mechanics

    Some Runewords can also provide access to skills from other classes, creating additional options for character customization.


    Runewords & Two-Socket Equipment

    Runewords require compatible equipment with two Sockets. Supported equipment includes:

    • Helms
    • Chest Armor
    • Pants
    • Two-Handed Weapons

    You need to place one Ritual Rune and one Invocation Rune into the two available Sockets to activate the Runeword.

    You can equip up to two Runewords at the same time, using a total of four Runes. The same Rune cannot be equipped twice.


    How to Choose a Runeword

    Before choosing a Runeword, check the complete Rune combination rather than looking at only one effect.

    Consider:

    • Ritual condition: Can you generate Offering naturally during combat?
    • Invocation effect: Does the effect support your main skills or build?
    • Offering requirement: How quickly can your character reach the required amount?
    • Overflow effect: Can additional Offering improve the Invocation effect?
    • Rune rarity: Does the available Rune provide the strength you need?
    • Equipment slot: Can you use the Runeword on your available two-Socket gear?

    A good Runeword should complement your existing setup instead of forcing unnecessary changes to your playstyle.


    Buy Diablo 4 Runewords at MMOSO

    Choose the Runeword that matches your class, build, and equipment setup. Before placing an order, check the Rune combination, effect, rarity, and equipment requirements listed for the product.

    Available Runewords may vary by listing, so review the individual product details to make sure the combination matches what you need.

    FAQ

    • Q What are Diablo 4 Runewords?
      A
      - Runewords combine one Ritual Rune and one Invocation Rune in compatible two-Socket equipment to create additional character effects.
    • Q What is the difference between Ritual and Invocation Runes?
      A
      - Ritual Runes generate Offering when their conditions are met, while Invocation Runes consume Offering to activate their effects.
    • Q What is Offering?
      A
      - Offering is the resource generated by a Ritual Rune and consumed by an Invocation Rune to activate its effect.
    • Q What is Overflow?
      A
      - Overflow allows certain Invocation Runes to gain additional benefits when more Offering is generated than the amount required to activate them.
    • Q What equipment can use Runewords?
      A
      - Runewords require compatible two-Socket equipment, including Helms, Chest Armor, Pants, and Two-Handed Weapons.
    • Q How many Runewords can I equip?
      A
      - You can equip up to two Runewords at the same time, using four Runes in total. The same Rune cannot be equipped twice.
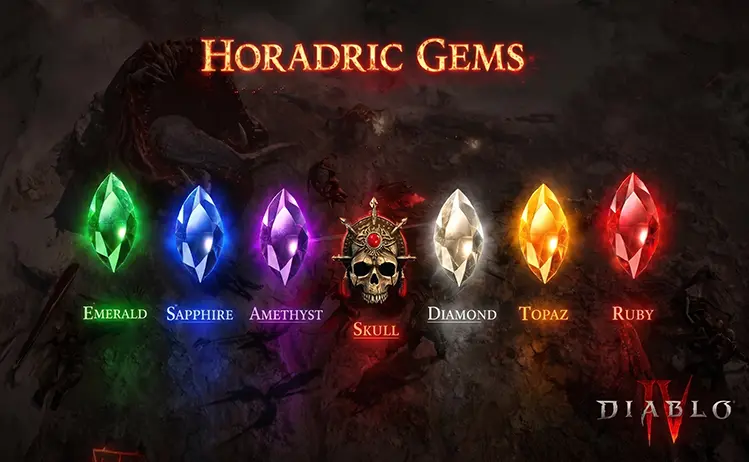
    Diablo 4 Horadric Gems Guide: Farming and Crafting Diablo 4 Horadric Gems Guide: Farming and Crafting

    Diablo 4 Horadric Gems Guide: Farming and Crafting

    Learn how to farm and craft Horadric Gems in Diablo 4, including Royal Gem sources, crafting costs, Gem Cache rewards, and efficient upgrade methods.
    Read more Sep-30-2026
    Diablo 4 Horadric Gems Guide: Farming and Crafting
    Diablo 4 Crushing Hand Gorilla Spiritborn Build Guide Diablo 4 Crushing Hand Gorilla Spiritborn Build Guide

    Diablo 4 Crushing Hand Gorilla Spiritborn Build Guide

    Learn how to build the Crushing Hand Gorilla Spiritborn in Diablo 4 Season 15, including its core skills, Spirit Hall, gear, resource setup, Paragon, and combat rotation.
    Read more Sep-30-2026
    Diablo 4 Crushing Hand Gorilla Spiritborn Build Guide
    Diablo 4 Soul Splinters Farming Guide for Season 15 Diablo 4 Soul Splinters Farming Guide for Season 15

    Diablo 4 Soul Splinters Farming Guide for Season 15

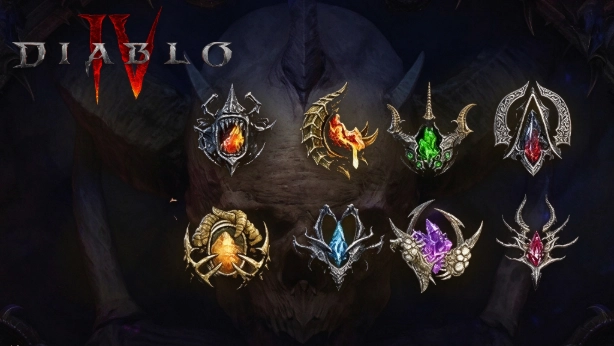
    Diablo 4 Season 15 introduces Soul Splinters, powerful socketable gems for rings and amulets that grant major bonuses paired with meaningful drawbacks. This guide covers all eight Soul Splinters, their effects and ideal use cases, how to farm and upgrade them via Waking Nightmares and the Horadric Cube, and how to pair them with Leoric’s Crown for maximum build potential.
    Read more Sep-29-2026
    Diablo 4 Soul Splinters Farming Guide for Season 15
    Diablo 4 Season 15: Bone Spirit Necromancer Build for Leveling and Endgame Diablo 4 Season 15: Bone Spirit Necromancer Build for Leveling and Endgame

    Diablo 4 Season 15: Bone Spirit Necromancer Build for Leveling and Endgame

    Bone Spirit returns as a top Necromancer build in Diablo 4 Season 15. Learn the best leveling path, gear priorities, and Pit push rotation.
    Read more Sep-28-2026
    Diablo 4 Season 15: Bone Spirit Necromancer Build for Leveling and Endgame
    Diablo 4 Hotfix 4 Fixes Warlock Damage and Farming Issues Diablo 4 Hotfix 4 Fixes Warlock Damage and Farming Issues

    Diablo 4 Hotfix 4 Fixes Warlock Damage and Farming Issues

    Diablo 4 Hotfix 4 fixes several Season 15 issues, including Warlock damage interactions, Prime Evil Council farming, infinite Butcher spawns, and progression bugs.
    Read more Sep-24-2026
    Diablo 4 Hotfix 4 Fixes Warlock Damage and Farming Issues
    Customer Reviews View More >
    Excellent
    TrustScore 5 out of 5

    TrustScore Excellent 5.0 | 3478 reviews

    review
    D**o

    Ella knocked it out of the park. Service was beyond expectat......

    Oct-05-2026
    J**h

    Very fast and speedy service. Ella was fantastic!......

    Oct-05-2026
    P**e

    This was my first time using MMoso to purchase items online.......

    Oct-05-2026
    J**r

    Ella wad very helpful and stayed on customer support during ......

    Oct-05-2026
    back

    SIGN UP

    close
    *
    email-log
    *
    verified-code-icon
    *
    email-log
    close_eyes
    open_eyes
    *
    email-log
    close_eyes
    open_eyes

    LOGIN

    email
    password
    Already have an account? LOG IN
    close

    Thank you for using this website through social login. In order to better use the functions of mmoso, please add your email address first. If you have questions, please consult our customer service.

    email
    verified-code-icon