


 Diablo 2: Resurrected
 Diablo 4
 Path Of Exile 2
 Animal Crossing
 Path Of Exile
  Last Epoch
  FC 25
FC 25  WoW WotLK Classic
  Runescape
  WOW Classic SOD
  Steam
Steam  StarRupture
  Elden Ring
 Are you sure you want to delete all items?
Elden Ring: Leyndell Sewers Leyndell Catacombs Detailed Walkthrough
category:Elden Ring
Apr-23-2024 Source: MMOSO
Leyndell Catacombs is an underground tomb maze located in the northwest corner of Elden Territory, and is one of the largest and most difficult tombs in the game. It consists of countless rooms and tunnels, filled with deadly traps and powerful enemies. We must find the Shunning Grounds first and then we can only find its entrance inside this place. This entrance is easily overlooked, so it is important to look for it carefully. Once entered, one will be placed in a huge and dimly lit tomb.
Leyndell Catacombs
Ignore the path to the right and ride the elevator up to an area with some Leyndell Foot Soldiers that continuously respawn. To permanently defeat them, strike the wall to the right of the stairs to reveal a hidden area and then strike the southwest wall to find a Spiritcaller Snail near a corpse with the Haligdrake Talisman +1.
With the enemies now cleared out, head upstairs and pick up the Golden Rune and then continue northwest to find a lever that opens another shortcut back to the Site of Grace. You can now backtrack to the elevator and ride it back down, this time heading down the other tunnel to reach the Site of Grace: Leyndell Catacombs.
From the Site of Grace make your way southwest to the locked double doors and then veer southeast to a flooded room with some Putrid Corpses. Continue upstairs and head straight to encounter some more Putrid Corpses near a corpse with a Ghost Glovewort and then turn around and take the left passage to encounter some explosive Putrid Corpses.

Proceed into the room with the flame pillar, using the passage on the right to hide, and deal with the Putrid Corpse and then ride the pillar up to access the chapel above to deal with an Omen guarding the Crucible Scale Talisman. You can now backtrack to the passage used to take cover from the flame pillar and head upstairs to encounter an Omen near a Grave Glovewort and then continue northeast to drop into another flooded room.
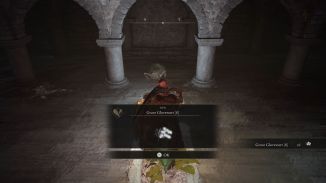
Deal with the Putrid Corpses that appear and collect the Grave Glovewort from the coffin in the middle and then make your way northwest to find the "boss room" open.
This identical room isn't actually the boss room, however, there are two Omens inside that you can lure to attack each other. Once you've dealt with the enemies, collect the Ghost Glovewort and Golden Rune from the room and then head upstairs to the northeast to find a dead-end with some Resin Root x4.
Backtrack to the flooded room and head southeast this time and then veer southwest at the fork to continue toward the inactive flame pillar. Ignore the flame pillar for now and hang a right at the split and then continue upstairs past some Putrid Corpses to find a Grave Glovewort. You can now continue upstairs to deal with the Omen standing over the corpse of another before heading northeast to drop into another flooded room.
Since there's only one way to go, head upstairs to the southeast and continue straight into the room with some Putrid Corpses and a Grave Glovewort and then backtrack and take the other path to the southwest to find a Grave Glovewort in the alcove on the left. Continue southwest to the room that is identical to the one with the flame pillar and deal with the Omen that jumps down to ambush you and then grab the Grave Glovewort beneath the platform.
Backtrack to the fork and head northwest to reach a dead-end with an arched window and then jump through the window. This will drop you into the previous area, so head downstairs to the southeast and then hang a right to reach the flame pillar.

Once again, use the pillar to reach the upper level and then head northwest to encounter some Fanged Imps. Continue to follow the tunnel down the ladder and you'll eventually reach the upper level of the flooded room with the lever to the double doors, as well as a corpse with Sacramental Bud x2. You can now drop into the flooded room and head northwest to return to the Site of Grace or enter the boss room.
Boss: Esgar, Priest of Blood
Esgar, Priest of Blood wields a Reduvia dagger similar to Bloody Finger Nerijus that deals Blood Loss build-up and is accompanied by two blistered Rotten Strays, which also inflict Blood Loss. As such, it's a good idea to increase your resistance to Blood Loss if possible and bring some Preserving Boluses along for the fight.
At the start of the fight, keep your distance from Esgar and focus on the two Rotten Strays that aggressively pursue you since they ultimately make the fight much more difficult. Make sure to keep Esgar within view to avoid being hit with Reduvia's Blood Blade skill from a distance and watch out when Esgar stands still and summons a Swarm of Flies. This incantation will follow you around for a short distance and deals a massive amount of Blood Loss build-up if not avoided.

Other than these two attacks, Esgar can counter with Bloodflame Talons when you're at close-range, however, his low poise makes it fairly easy to stunlock him to prevent this.
Reward: 30000 Runes and the Lord of Blood's Exultation.
Recommended news
-

Path of Exile 3.24: Fast and Effectively Farming POE Orbs.
Apr-22-2024 -

The Best Barbarian Whirlwind Build in Diablo 4
Apr-20-2024 -

Introduction to the Abilities of Stealth of Different Races in WoW WotLK Classic
Apr-19-2024 -

Some common but extremely practical Unique in Diablo II: Resurrected Season 6.
Apr-18-2024 -

Last Epoch Marksman Hail of Arrows Build Guide
Apr-17-2024 -

Elden Ring: Gelmir Hero's Grave Guide
Apr-16-2024


Thank you for using this website through social login. In order to better use the functions of mmoso, please add your email address first. If you have questions, please consult our customer service.


