
 Games


AION 2 Native Macros: Setup Guide & Class Rotation Templates
category:Aion 2
Nov-10-2026 Source: MMOSO
If you have spent any time browsing AION 2 community content, you have likely run into countless macro clips for the Chanter class. Most of these short gameplay videos skip the core setup rules, leaving new players confused about how the native macro system actually works inside the game client.
This guide breaks down the official macro mechanics in AION 2, walks you through the full setup workflow, and shares ready-to-use starter macro templates for all eight playable classes. Whether you are optimizing your PvE rotation or building a separate combo for PvP, these baseline sequences can be adjusted to match your ping, gear attack speed and preferred playstyle.
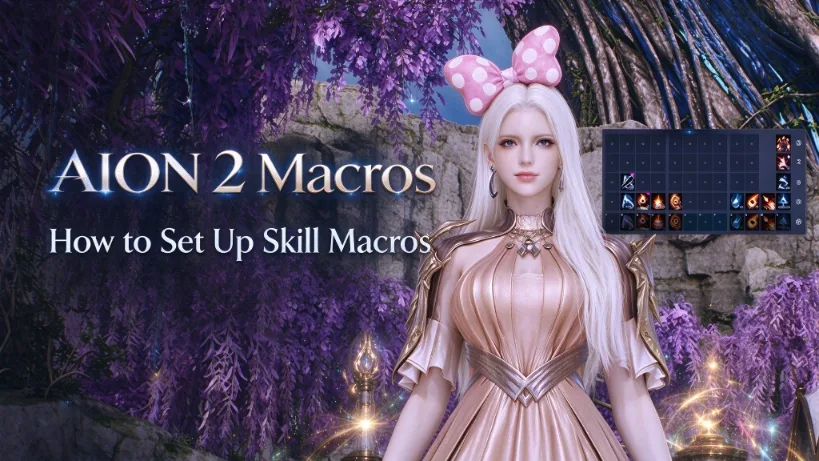
Quick Answer
Head into Skill Settings and open the dedicated Macro tab. Click Add Macro to begin stacking your skills as individual steps. Every single step requires a custom delay value, and the valid range for each delay sits between 10 ms and 9,900 ms.
After building your sequence, navigate to Settings > Key Settings > General > Macro and assign a hotkey. Macros will only execute while you hold the assigned key, and any manual skill input will always take priority over the macro rotation.
Always build your macro around your chosen class build: place setup and debuff skills at the start, reserve basic attack filler for the end, and tweak delay values to compensate for your latency and character attack speed.
How the AION 2 macro system works
AION 2 features an integrated macro tool built directly into the Skill Settings panel, rather than relying on third-party automation software. Every macro is constructed as an ordered list of skill steps, and each step can have its own independent timing configured via the Specify Delay option. You can also drag finished macros onto your quickbar as Quick Slot Macros, and customize the icon displayed for each macro within Macro Icon Settings.
The game client enforces a clear set of rules that every player must understand before building rotations:
- The macro only runs for as long as you hold its bound hotkey. The rotation stops immediately once you release the key.
- Manual player input overrides the macro at all times. If you press a skill manually mid-chain, your input will trigger first.
- The sequence does not guarantee rigid step execution. The macro continuously attempts to advance to the next entry, so you should treat your macro as a priority list instead of a perfectly locked combo.
- All individual step delays must fall within the 10 ms to 9,900 ms window.
- Mouse button hotkeys cannot function properly if you are using AION 1 Control Mode.
- Switching your active skill preset will interrupt any macro that is currently running.
- There is a cap on the total number of macros you can save. Some skills are restricted from being added to macros, and certain character states will prevent a macro from activating.
How to set up a macro
Step 1: Open Skill Settings
Launch the Skill Settings window and switch over to the Macro tab. This is the central hub where you create, edit and manage all your saved macro sequences.
Step 2: Add your steps
Select Add Macro, then add skills in the priority order you want the macro to attempt. Position gap closers, stuns, marks and debuff setup skills at the front of the chain. Save your basic attack filler skills for the final positions in the sequence.
Step 3: Set a delay per step
Use Specify Delay on every skill entry. A good starting strategy is to apply the same short delay across all steps first. After testing, increase the delay for any skills that keep getting skipped, with special attention to charged skills such as Deadshot or Hellfire.
Step 4: Bind a hotkey
Go to Settings > Key Settings > General > Macro and assign a hotkey. Players using AION 1 Control Mode should stick to keyboard keys, as mouse binds will not work reliably.
Step 5: Optional: add it to a quick slot
You can place the finished macro onto your action bar as a Quick Slot Macro, and pick a custom icon for it inside Macro Icon Settings for easier visual identification.
Step 6: Test and tune
Test the macro on a low-risk group of enemies. Watch closely to see which skills successfully fire, then reorder your steps or adjust timings accordingly.
Adjust delays to your ping and attack speed
There is no universal delay value that works for every player. Your network latency, character attack speed and skill animation length all change how smoothly a macro runs.
If a skill is repeatedly skipped, extend the delay before that step. If your rotation feels sluggish and slow, reduce the delay values to tighten the chain.
Once you have your macro rotation ready, you will need enough in-game currency to buy stigmas, potions and gear for testing. Grab reliable AION 2 Kinah here to skip tedious farming and focus on tuning your macros. Attack speed from gear also affects timing—see our Item Level Guide for progression tips.
Starter macro templates for every class
All of these starter templates follow the standard leveling build skill order featured on our dedicated class build pages. Each template opens with the core opener chain, and ends with the class’s basic attack filler skills. Since the macro does not guarantee strict step order, keep crowd control, marking and debuff setup skills near the top and filler attacks at the bottom.
| Class | Macro Rotation & Notes |
| Gladiator | Opener: Leaping Slam → Mocking Blade → Overhead Slam → Ruinous Blow → Crushing Wave Filler: Rending Blow + Keen Strike Note: Overhead Slam only works against downed targets, knockdown must come first. |
| Templar | Opener: Pooch → Shield Smite → Judgment → Annihilate → Punishment → Wording Strike Filler: Vicious Strike + Pummel Note: Pull the pack first. Wording Strike heals on hit. |
| Assassin | Opener: Shadowstrike → Savage Roar → Ambush → Heart Gore → Insignia Explosion → Flash Slice Filler: Quick Slice Note: Ambush is back-attack; get behind target first. |
| Ranger | Opener: Marking Shot → Snare Shot → Burst Arrow → Gale Arrow → Deadshot → Drill Dart Filler: Tempest Shot + Snipe Note: Deadshot is charged and needs longer delay. |
| Sorcerer | Opener: Wish of Concentration → Ice Chain → Winter's Shackles → Hellfire → Firestorm → Blaze → Bittercold Wind Filler: Flame Arrow Note: Hellfire is charged and needs extended delay. |
| Spiritmaster | Opener: Jointstrike: Curse → Dimensional Control → Combustion → Elemental Fusion Filler: Cold Shock Note: Summon spirits manually or in a separate macro beforehand. |
| Chanter | Opener: Rushing Smash → Impactful Crush → Dark Crush → Spinning Strike Filler: Incandescent Blow + Onslaught Note: Keep Recuperation (party heal) on manual hotkey. |
| Cleric | Opener: Divine Aura → Chain of Torment → Condemnation → Judgment Thunder → Debilitating Mark Filler: Earth's Retribution Note: Condemnation only hits tormented targets. Healing Light stays manual. |
Keep heals and emergency buttons out of the loop
Damage-focused macros should never handle healing, cleanse or defensive dodge abilities. Skills such as Recuperation and Healing Light deserve their own independent hotkeys.
Remember that manual input overrides macro execution, so you can press these emergency skills at any point while your macro chain is running.
Class-by-class tips
Melee Classes: Gladiator, Templar and Assassin
These melee templates start with gap closers and crowd control abilities, because many follow-up skills require a knocked-down, stunned or rear-facing target.
Long cooldown self-buffs like Zikel's Blessing or Illusive Clone perform better in a short standalone buff macro, so they do not occupy valuable space inside your main damage loop.
Ranged Classes: Ranger, Sorcerer and Spiritmaster
Ranged class sequences prioritize setup effects first, such as Marking Shot, Ice Chain or Jointstrike: Curse, before unleashing heavy-hitting damage skills. All charged attacks require the longest delay values.
Pre-fight buffs including Vaizel's Authority, Element Enhancement or Summon: Ancient Spirit should live in a separate macro you activate before engaging combat.
Support Classes: Chanter and Cleric
These support templates only cover damage rotations. The Chanter sequence chains Rushing Smash into Impactful Crush and Dark Crush, then Spinning Strike for its critical strike buff. The Cleric opens with Divine Aura and Chain of Torment.
Mantras such as Undefeated Mantra and Sprint Mantra work great as a separate buff macro, while healing skills stay manual.
Presets and PvP
Switching your skill preset will immediately stop any active macro. Always swap your preset first, then hold your macro hotkey to start the rotation.
Each class build page also includes a PvP preset built around fast crowd control. You can build a second macro tailored specifically for PvP encounters using this preset.
Key Takeaways
- AION 2 offers a native macro system inside Skill Settings, built around skill steps, adjustable delays ranging from 10 ms to 9,900 ms, and a hold-to-run hotkey system.
- Macro hotkeys are assigned under Settings > Key Settings > General > Macro. Mouse binds will not work in AION 1 Control Mode.
- The macro cannot guarantee strict step ordering, so design your sequence as a priority list: setup skills first, filler attacks last.
- Start with the starter template from your class build preset, then tune delays around your ping and attack speed.
- Heals, cleanses and defensive cooldowns should stay on manual binds; your manual input always overrides macro behavior.
Recommended news
-
How to Get and Upgrade Ludra's Bracelet in Aion 2
Nov-06-2026 -
Aion 2 Essence Extraction Guide: Farming Routes & Tier Upgrade
Nov-05-2026 -
Aion 2 Ludra Accuracy Guide: How Much Accuracy Do You Need on Global?
Nov-05-2026 -
Aion 2 Assassin PvE Build Guide: Savage Fang vs. Evasion Stance for Your Fourth Stigma
Oct-29-2026 -
Aion 2 Ludra Raid Guide: Entry Requirements, First Clears, and Rewards
Oct-24-2026 -

Aion 2 Item Level Guide (2026): 1000 to 2400+
Oct-22-2026


Thank you for using this website through social login. In order to better use the functions of mmoso, please add your email address first. If you have questions, please consult our customer service.


